Setting Up Multifactor Authentication (MFA) with Microsoft Authenticator App
Multifactor authentication (MFA) enhances the security of your NU Microsoft 365 resources. If you are new to NU, you will be prompted to register your phone the first time you sign in to Microsoft 365 apps. We recommend using Microsoft Authenticator app for receiving notifications on your smartphone and verifying your identify when prompted for MFA. Here is how to set it up:
Step 1. Download and Install Microsoft Authenticator
- Visit the Apple App Store or Google Play Store on your device to download and install the Microsoft Authenticator app.
Step 2. Add Your Account to the App
- In the Authenticator app, select the [+] (Add account) icon.
- Select Work or school account as the account type and select Scan a QR code.
- Sign in to https://www.microsoft365.com/ on your computer or laptop or continue with the setup process. Follow the on-screen prompts until you reach the “Scan the QR code” page. Use the Authenticator app to scan the QR code.
- To test your account, a 2-digit code will be displayed on the screen while an identity verification request is sent to the app on your mobile device.
- Open your Authenticator app and enter the randomly generated code in the Enter number box.
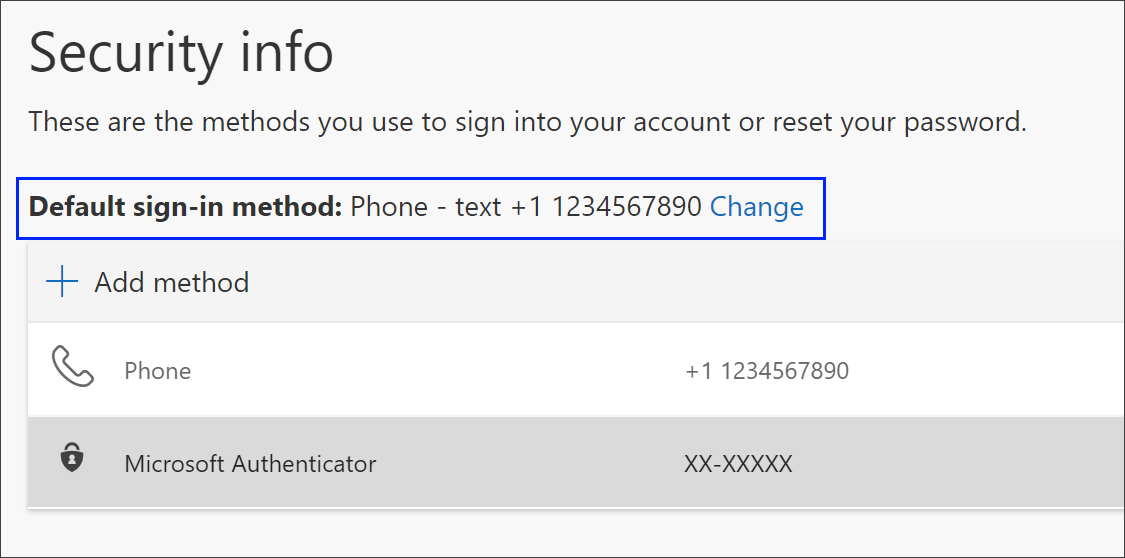
Step 3. Update Your Default Security Info Method
- On your computer, visit https://mysignins.microsoft.com/secuirty-info to change your default sing-in method to MFA from the Security info page.
- Select Change next to the Default sing-in method information.
- Choose Authenticator – notification from the list of available methods, then Confirm.
Deleting Your NU Account from the Authenticator App
If you need to delete the linked NU account, open the app on your mobile device and tap the account name to view the details, tap the gear icon on the top right to open the Account Settings page, then tap Remove account to remove it. Repeat the Steps #1 to #3 to start over.
Resource: Set up the Microsoft Authenticator app as your verification method (Microsoft)